
Camera Settings for Plane Spotting Photos
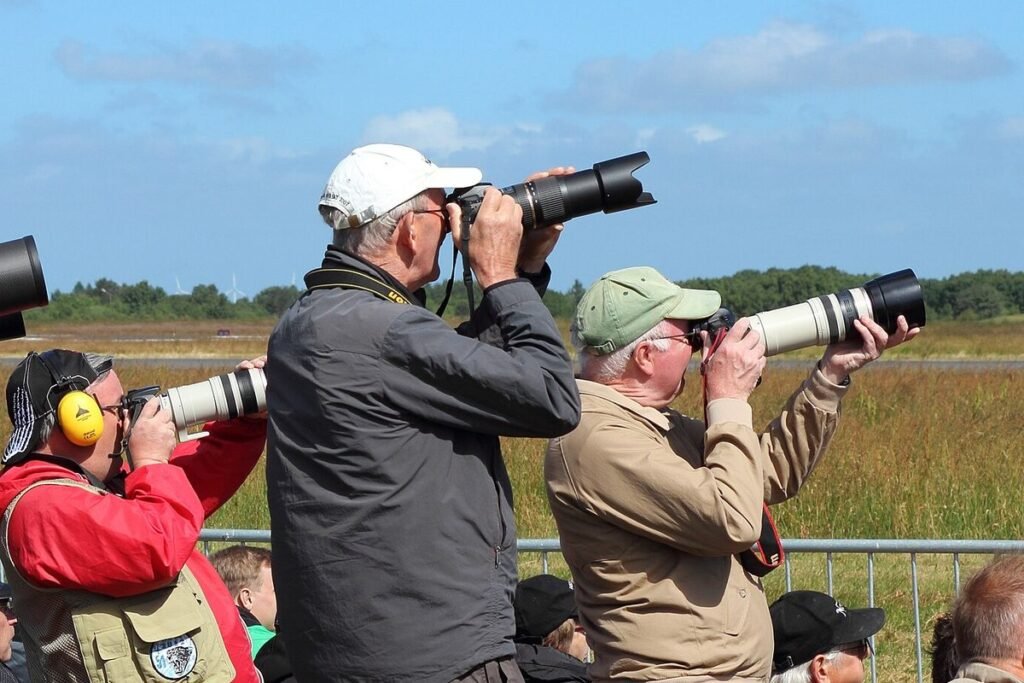

Good plane spotting camera settings start with shutter priority, 1/1000 s or faster for jets, 1/125 to 1/250 s for propeller aircraft so the blades blur, f/7.1 to f/8, auto ISO and continuous autofocus. Those numbers cover most daylight shots at the fence. The rest is light direction, focal length and heat haze, which ruin more spotting photos than any menu setting.
Shutter speed: jets, props and helicopters
Shutter speed is the setting that changes most between aircraft types. A jet on final moves at roughly 130 to 160 knots, so any blur comes from you, not from the engines. A propeller frozen solid, on the other hand, makes an airplane look parked in midair.
| Subject | Shutter | Aperture | ISO | Notes |
|---|---|---|---|---|
| Jets in daylight | 1/1000 to 1/2000 s | f/7.1 to f/8 | Auto, 100 to 800 | Freeze everything, sharpness first |
| Turboprops (ATR, Dash 8) | 1/160 to 1/250 s | f/8 to f/11 | Low, 100 to 200 | Partial blade blur |
| Piston singles and twins | 1/125 to 1/200 s | f/8 to f/11 | Low | Full prop disc, needs panning |
| Helicopters | 1/60 to 1/125 s | f/8 to f/11 | Low | Rotor blur, expect many misses |
| Jets at dusk | 1/500 to 1/800 s | Wide open | Auto, up to 6400 | Accept some noise |
At slow shutter speeds, panning is the whole technique. Plant your feet, track the airplane before pressing the shutter, shoot a short burst while turning smoothly from the hips, and keep following through after the last frame. Switch the lens stabilizer to its panning mode if it has one, usually labeled mode 2. Expect a low keeper rate at 1/125 s at first; spotters who nail it consistently practiced on hundreds of frames.
Aperture and depth of field
At spotting distances, depth of field is not a concern: a 737 several hundred feet away is sharp from nose to tail even at the widest aperture. Aperture matters because most zoom lenses are sharpest about one stop down from wide open. On f/5.6 to f/6.3 telephotos, f/7.1 to f/8 is the sweet spot. Close down further only to reach a slower shutter speed for prop blur in bright sun, or use a light ND filter if f/11 still gives you too fast a shutter.
ISO and exposure
Auto ISO with a sensible ceiling keeps the shutter where you want it. A cap of 3200 on most APS-C bodies and 6400 on full frame is a practical starting point. Exposure is trickier than it looks:
- Bright sky behind the aircraft fools the meter into underexposing. Dial in +0.3 to +1 EV.
- White fuselage in direct sun clips easily. Turn on highlight warnings and back off exposure until the blinkies vanish from the fuselage.
- Manual exposure with auto ISO is a good compromise: you fix shutter and aperture, the camera adjusts ISO, and exposure compensation still applies on most bodies.
Shoot RAW. White fuselages and blue skies are exactly where JPEG compression and limited dynamic range show, and RAW files give you room to recover highlights when you process for upload.
Focal length: 100–400 vs 150–600
Focal length depends on how far the spot is from the runway. At close spots like the In-N-Out at LAX, aircraft on short final can overflow a 400mm frame, and a 70–200mm lens is easier. At most fence spots, a 100–400mm zoom is the workhorse, and at spots far from the centerline you need 500 to 600mm.
100–400mm class
Options include Canon’s RF 100-400mm f/5.6-8, an affordable lightweight zoom, along with pricier pro versions from Sony and Nikon. On an APS-C body with a 1.5x or 1.6x crop factor, 400mm frames like 600mm, which is why many spotters stay on crop sensors.
150–600mm class
Sigma’s 150-600mm, Tamron’s 150-500mm, Sony’s FE 200-600mm, Nikon’s Z 180-600mm and Canon’s RF 200-800mm are the usual choices. They are heavier and slower to aim, but they let you shoot taxiing traffic across a wide airfield and pull registrations from far away.
I carried a 100–400 for years and only missed the extra reach at a couple of big-field spots. Start with the shorter zoom unless you already know your local spots are far from the runways.
Autofocus modes that track aircraft
- Continuous AF (AF-C on Nikon, Sony and Fujifilm; AI Servo on Canon) is mandatory for anything moving.
- Area: a zone or expanded point over the nose or cockpit works well. Wide tracking can lock onto a fence post or a cloud edge.
- Subject detection: many recent bodies from Canon, Nikon and Sony include vehicle or airplane recognition. It helps a lot against cluttered backgrounds; test it on your local traffic before relying on it.
- Back-button focus separates focusing from shutter release, so you can keep tracking between bursts.
- Burst: 8 to 15 frames per second is plenty. Fire short bursts at the moment that matters, such as rotation or touchdown, rather than holding the button for the whole pass. Watching the approach on Flightradar24 tells you when to raise the camera, which saves your arms on long waits.
Light direction and heat haze
The best spotting photos have the sun behind you, lighting the side of the aircraft facing the lens. That makes timing a function of the spot: a spot on the south side of an east-west runway works for much of the day, while a north-side spot is backlit until late afternoon. Apps such as PhotoPills or The Photographer’s Ephemeris show the sun’s path over any runway for a given date. Combine that with the wind in the morning METAR, which tells you the runway in use, and you know before leaving home whether the light will be with you. I plan most outings this way, because driving an hour to shoot into the sun gets old fast.
Heat haze is the other big enemy. Air rising off hot pavement and grass bends light, making anything beyond a few hundred yards look soft or wavy, and longer focal lengths magnify it. Fixes that work:
- Shoot early morning and late evening, when the ground is cooler.
- Get closer and use a shorter focal length rather than cropping from far away.
- Shoot aircraft in the air rather than on the ground; the haze is thickest near the surface.
- Prefer cool, overcast or winter days for long-distance taxi shots.
Processing for photo sites
If you plan to upload aircraft photos to screened sites like JetPhotos, the processing matters as much as the capture. Screeners reject photos for softness, poor exposure, oversaturation, compression artifacts, tilted horizons and poor framing. Keep it simple: level the horizon using the runway or a vertical structure, crop with the aircraft centered and a little room in front of the nose, apply moderate sharpening after resizing, and check that the colors of the livery look the way the airline paints them. Save at high JPEG quality and stick to the size limits each site publishes.
For dusk and night shots, a tripod opens up a different style: exposures of one to several seconds turn departures into light trails across the frame. Set ISO 100 to 200, f/8 to f/11, and let the airplane draw its own path.
FAQ
How fast should the shutter be for airplanes?
Use 1/1000 s or faster for jets to freeze motion and camera shake. For propeller aircraft, slow down to about 1/125 to 1/250 s so the blades blur, and pan smoothly with the aircraft.
Which lens is best for plane spotting?
A 100–400mm zoom covers most airport fence spots. For distant runways or taxiways, a 150–600mm class lens adds reach, while very close spots under the approach can work with a 70–200mm.
How do you avoid heat haze in aircraft photos?
Shoot in the cooler hours of early morning or evening, get closer, and use a shorter focal length. Aircraft in the air are less affected than aircraft on the ground, where the haze is thickest.
Should you shoot RAW for plane spotting?
Yes, RAW files keep more detail in white fuselages and bright skies, which are easy to clip. They also give you more room to fix exposure and color before uploading.
Keep exploring
- Plane SpottingBest Plane Spotting Spots at US Airports
- Plane SpottingAircraft Photo Websites: JetPhotos
- Plane SpottingPlane Spotting for Beginners: Gear
- Air TravelSeatGuru Alternatives: Where to Check Seat Maps Now
- Aviation CareersAirline Pilot Salary in 2026: Regional to Major
- Aviation News & MediaBest Aviation News Websites to Follow
- Flight SimulatorsFlight Sim Setup: Yokes